Facebook marketing is now a must for businesses. The reason? Its huge user base! Over 3.06 billion people use Facebook. That’s why 89% of businesses choose Facebook ads to promote their brand.
But running Facebook ads isn’t easy.
There’s a lot of competition. Plus, Facebook’s rules keep changing. Without a smart plan, you might waste your budget.
To succeed, you need a strategy. Do market research. Test different ads (A/B testing). Track important numbers to see what’s working.
This guide will help! It gives you a step-by-step process to run ads using Facebook Ads Manager. Plus, there’s a checklist to keep everything organized.
With the right plan, you can create the perfect Facebook Ads for the right audience!
Why Should You Run Ads on Facebook?
Facebook has almost 1.9 billion users daily. This makes it a great place for marketers to run ads and grow their business.
Compared to boosting a post, Facebook Ads work better. They have:
- Higher CTR (more people clicking on ads).
- Lower CPM (cheaper cost for 1,000 views).
- Lower CPC (less money spent per click).
- Better reach (ads shown to more people).
In 2024, Facebook made $164.5 billion from ads. That’s more than $134 billion in 2023!
Still not sure? Here’s why Facebook Ads Manager is worth it:
- Build brand awareness – Facebook ads show up while people scroll. Google ads only appear when someone searches. Plus, Facebook ads with images get more clicks and connect with people emotionally.
- Reach the right customers – Facebook knows interests, behaviors, income, and more. You can target the exact audience you want without wasting money.
- Get powerful insights – The Facebook Ads Manager tracks your ad performance in real time. You’ll see what works and improve future campaigns.
The success of your Facebook ads depends on getting the basics right. From what I’ve seen, many businesses run into problems because they set up Ads Manager incorrectly or don’t have a solid foundation.
The challenge is that mistakes can be costly when both time and money are involved.
To help you get on the right track, let’s start with a simple overview of Facebook Ads Manager and its main features.
Facebook Ads Manager
Before you run your first Facebook ad, you need to set up your Facebook Ads Manager account. This is a dashboard where you can see and manage all your ads.
Over the years, Facebook Ads Manager has added more features, making it a bit complex. To keep things organized, it has three main parts:
- Campaigns – This is the first step. Here, you choose your ad goal. Do you want more brand awareness, website traffic, sales, app downloads, leads, or engagement? Pick the one that fits your business.
- Ad Sets – This is where you select your audience. Who is your target audience for this ad? You can create multiple ad sets in one campaign, each with a different budget and target group.
- Ads – This is where you create your actual ad. You can try different formats, images, and placements to see what works best.
- Automated Ads – If you choose Automated Ads, Facebook will handle most of the setup for you. This is great for beginners but gives you less control over the details. You’ll see a list of your Automated Ads and their performance in this section.
Once your Facebook Ads Manager is set up, you’re ready to launch your first ad!
Now that you understand the power of Facebook Ads Manager, let’s go through the steps to create and run Facebook ads.
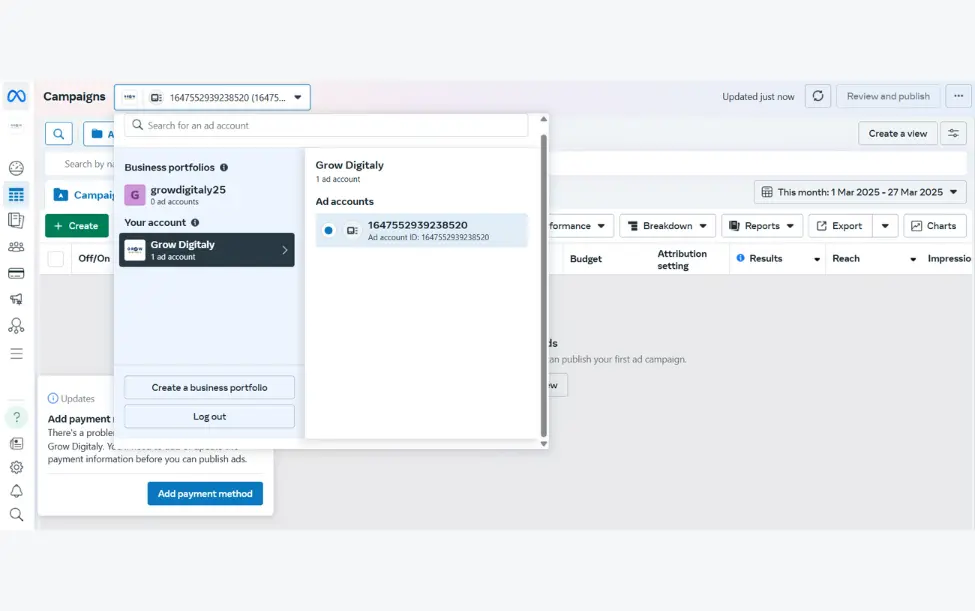
1. Create a Facebook Ads Manager Account
To use Facebook Ads Manager, you need a Facebook Business Page (not a personal profile). If you don’t have one, set it up first.
If you’re running ads for someone else, you need admin, editor, or advertiser access to their account.
Before launching your ads, add a payment method to your Meta Business account. This is how Facebook Ads Manager will charge you for your ads.
Once payment is set up, your Ads Manager becomes the control center for all your Facebook ads.
You can also access Facebook Ads Manager from your Facebook Business Page. Simply go to the left panel, click on Ad Center, and scroll down to find the Ads Manager link.

2. Create an Ad in Facebook Ads Manager
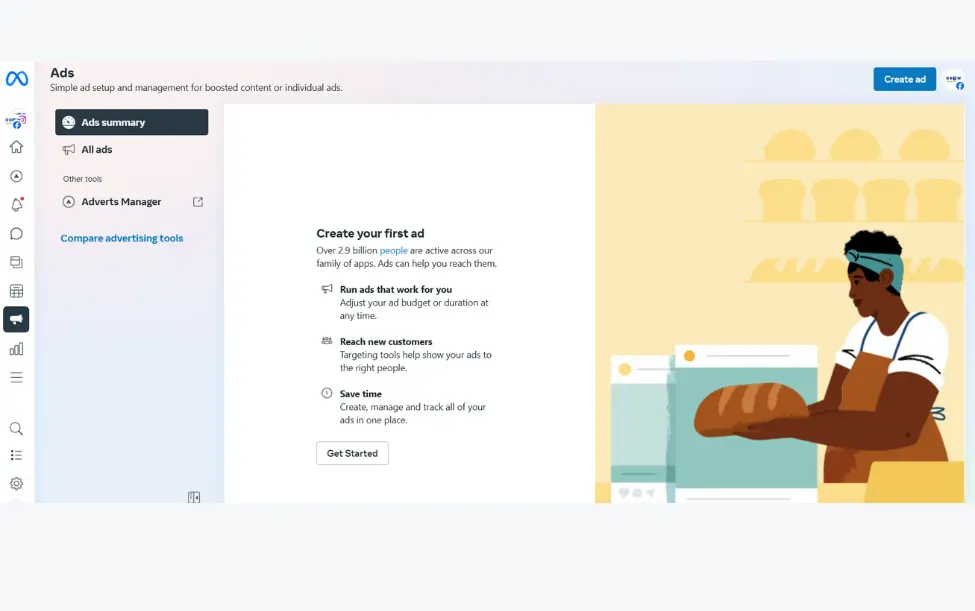
To start running Facebook ads, log into your Facebook Ads Manager account.
Here, you’ll see a performance dashboard. This shows all your campaigns, ad sets, and ads, along with their results. If this is your first time, the dashboard will be empty.
To create a new campaign, ad set, or ad in Facebook Ads Manager, select the type of ad you want to make. Then, find and click the green “Create” button on the left side.
3. Choose buying type
Meta offers two ways to buy Facebook ads: Auction and Reservation.
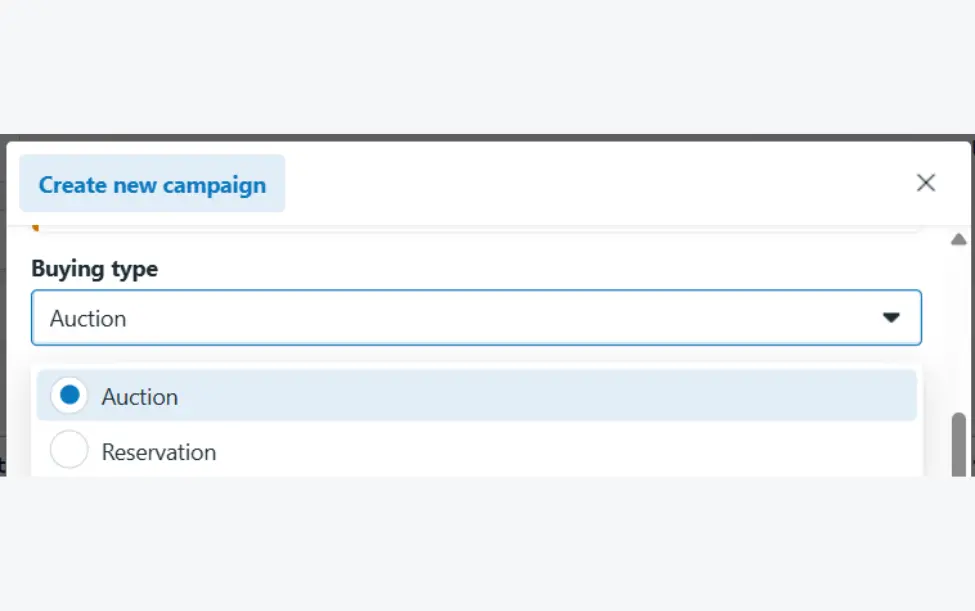
Auction – This option gives more flexibility and control. You can:
- Choose your campaign objectives.
- Set a daily or lifetime budget.
- Show ads on Facebook, Instagram, Messenger, and Audience Network.
- Use Advantage campaigns for better automation.
Reservation – This option is less flexible but offers predictable results. You can:
- Plan your ads in advance.
- Control how often people see your ads (frequency control).
- Show ads only on Facebook and Instagram.
4. Choose Your Campaign Objective
Before creating a Facebook ad, you need to pick an objective in Facebook Ads Manager. This helps Facebook show you the best ad options for your goal.
There are six main objectives:
- Awareness – Increase brand awareness, get more video views, or let people know about your store location.
- Traffic – Drive people to your website, Instagram, landing page, or WhatsApp.
- Engagement – Get more likes, comments, shares, and website interactions. Also helps increase messages and conversions.
- Leads – Encourage actions like form submissions, purchases, or booking appointments.
- Sales – Target people ready to buy from your website, app, or even through Messenger and Instagram.
- App Promotions – Get more app installs or boost in-app purchases.
Choosing the right objective is key! If you pick the wrong one, your Facebook ads might not perform well. Make sure your goal aligns with what you want to achieve.
5. Name Your Campaign
Give your Facebook Ads campaign a name that matches your business and goals.
For example, if your brand is XYZ and your goal is to increase traffic, you can name it “XYZ Traffic.”
A clear name helps you stay organized in Facebook Ads Manager and track your campaign’s success.

6. Choose Your Special Ad Category
Facebook has a Special Ad Category to prevent discrimination in certain types of ads. This means your audience targeting will be limited, but it helps ensure fairness by avoiding age and gender-based bias.

These ad categories fall under the Special Ad Category:
- Credit (Loans, credit cards, financial offers)
- Employment (Job postings, hiring ads)
- Housing (Real estate listings, rentals, mortgages)
- Social Issues (Politics, social causes, elections)
If your ad fits into one of these categories, you must select it in Facebook Ads Manager. This keeps your ads compliant with Facebook’s policies and ensures fair advertising.
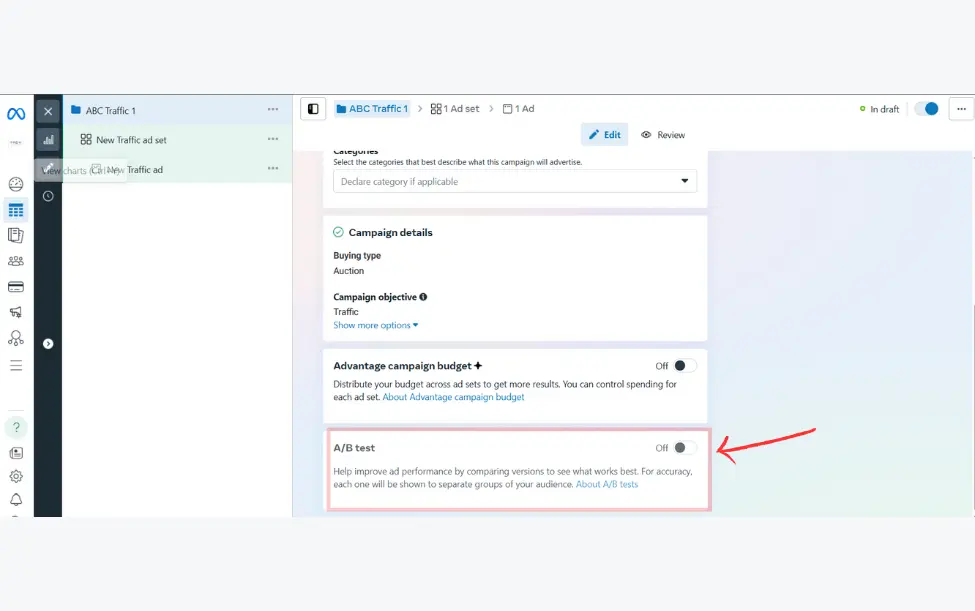
7. Choose A/B Split Testing
A/B testing in Facebook Ads Manager helps you find the best version of your ad.
You can test different images, text, ad placements, and CTAs to see what works best. This helps improve performance and save money.
Simply turn on or off the A/B test option to enable split testing.
8. Set Performance Goals in Facebook Ads Manager
Once you create a campaign, the next step is to set up an ad set. This helps estimate how many people will see your Facebook ads based on location, age, and other factors (demographics and geographical location).
Each campaign has performance goals—specific actions you want your audience to take.
For example, if your goal is driving traffic, you’ll choose where to send people:
- Website
- Mobile app
- Phone calls
- Instagram profile
If you want more website visits or Messenger chats, Facebook Ads Manager lets you choose goals like:
Maximize number of link clicks (more people clicking your ad).
Maximizing number of conversions (more people taking action, like signing up).
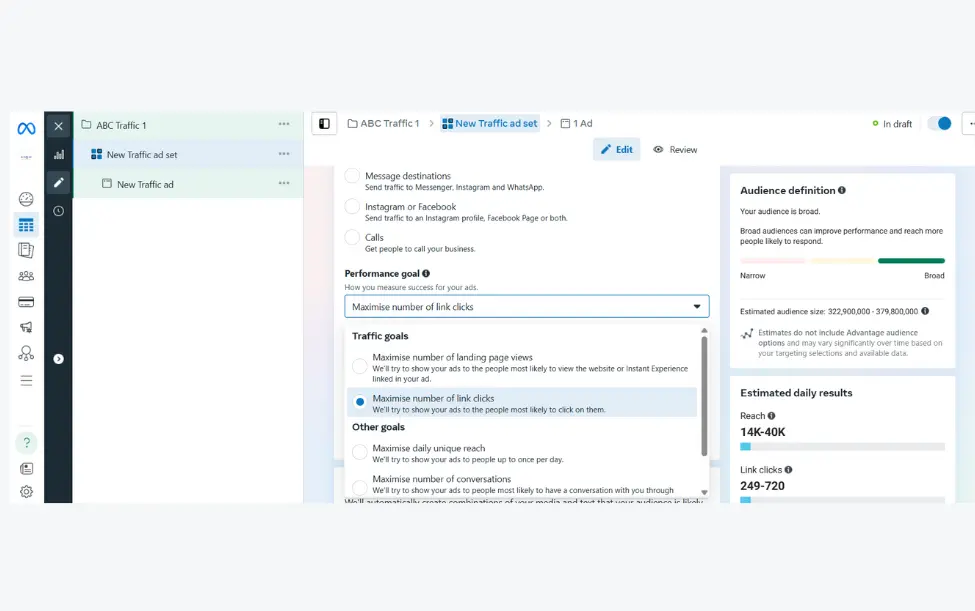
On the right side, you’ll see an audience reach an estimate based on your selections. This helps you fine-tune your Facebook ads for better results!
9. Set Your Budget and Schedule
Your ad budget is the maximum amount you’ll spend on your Facebook ads. You can choose between a daily budget or a lifetime budget.
🔹 Daily Budget – This option lets your ad run continuously throughout the day. Facebook Ads Manager will spread your spending evenly each day. The minimum daily budget is $1.00 and must be at least 2x your CPC (Cost-per-click).
🔹 Lifetime Budget – If you want your ad to run for a fixed time, choose this option. Facebook will distribute your budget over the entire period you set.
Pick the option that best fits your advertising goals!
10. Choose Your Audience in Facebook Ads Manager
The next step in setting up your Facebook ads is choosing your target audience. You do this for each ad set within a campaign. Picking the right audience can increase your ad reach while keeping your costs low.
(a) Audience Targeting Options
Facebook offers three main filters:
- Location – Target people in specific countries, cities, or regions.
- Gender – Choose to show ads to men, women, or both.
- Language – Target users based on the language they speak.
If you want more precise targeting, Facebook offers Meta Advantage+ Audience. This feature uses AI and data from Pixels to find the right people for your ads.
You can also switch to Custom Audience settings for more control. Meta even compares different targeting options and suggests the best one for your campaign.
(b) Broad vs. Specific Audience
- If your goal is traffic or conversions, focus on a specific audience that’s likely to be interested in your product.
- If you want brand awareness, a broader audience may work better.
Tip: Once you find an audience that works, save it in Facebook Ads Manager to use again later. This saves time on future campaigns!
11. Choose Your Ad Placement
Your Facebook ad placement affects both your budget and conversion rate. Some placements work better for different ad goals.
(a) Automatic Placement (Advantage+)
Facebook’s AI-powered Advantage+ automatically places your ad where it’s most effective. This helps you reach more people without manual setup.
(b) Manual Placement (For experienced advertisers)
If you want more control, you can manually choose where your ad appears. You can select:
- Devices (Mobile or Desktop)
- Platforms (Facebook, Instagram, Messenger)
- Placement Types (Feeds, Stories, Search, etc.)
- Content Exclusions (To avoid certain types of content)

Ad Placement Options:
- Feeds (Facebook, Instagram)
- Stories & Reels
- Reels Overlay
- In-Stream Videos
- Search Results
- Messenger Ads
- Apps & Overlay Ads
Choosing the right placement in Facebook Ads Manager helps you optimize performance and budget!
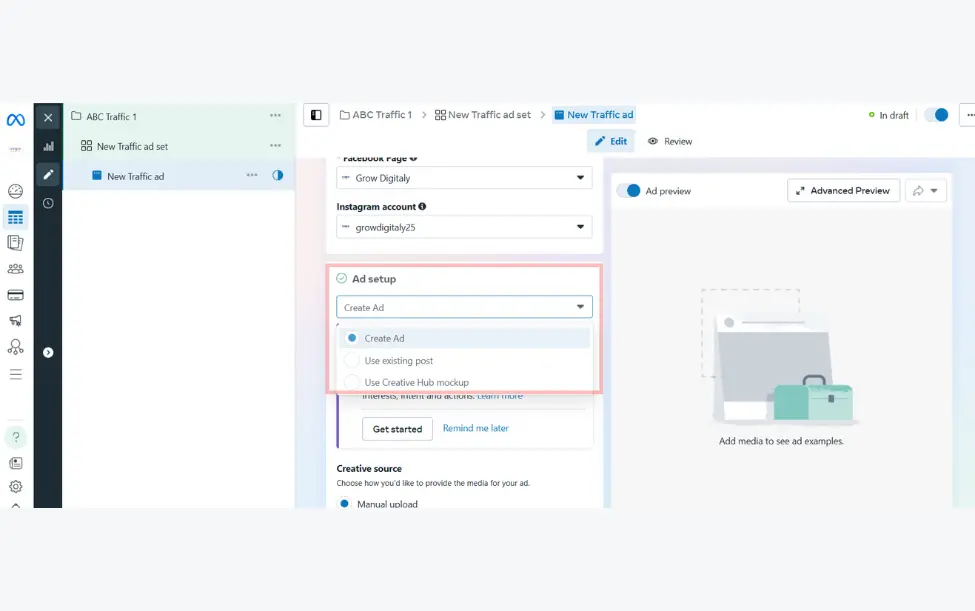
12. Setting Up Your Ad
After creating your campaign and ad sets, the next step is to set up your ads.
First, you need to set up your Meta account. Here, you can choose whether to connect your Facebook account with Instagram. This allows your ads to appear on both Instagram feeds and stories.
You can either use an existing post or create a new ad through the ad setup option.
Facebook also offers a creative mockup feature. This tool lets advertisers test different ad designs to see which one works best for their audience.
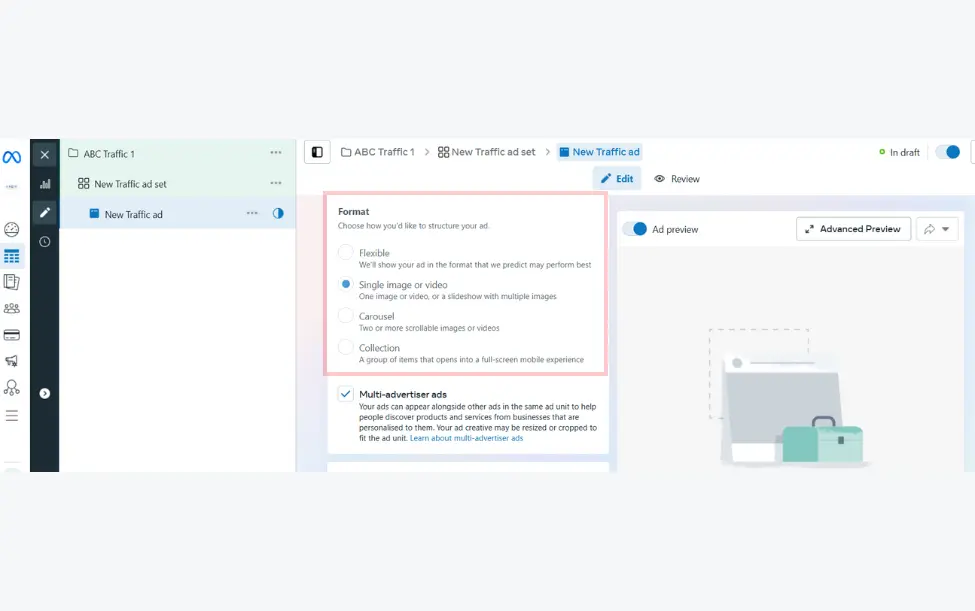
13. Choose Your Ad Format
When setting up your Facebook ad, you can choose between two formats:
- Single-Image Ad (Link Ad) – Shows one image.
- Carousel Ad – Displays 3 to 5 scrolling images at no extra cost.
Upload Your Ad Creatives
Once you choose a format, you’ll need to upload your images and text. Facebook has specific design requirements for each ad type:
Single-Image Ad Requirements:
- Text: 125 characters
- Headline: 25 characters
- Image ratio: 1.91:1
- Recommended size: 1080 x 1080 pixels
Carousel Ad Requirements:
- Image size: 1080 x 1080 pixels
- Image ratio: 1:1
- Text: 125 characters
- Headline: 40 characters
- Link description: 20 characters
Note: These ad formats apply if you chose the “Traffic” ad objective. If you picked “Boost Your Post,” you’ll see different options like Page Post Engagement Ads (Photo Ads) with their own design rules.
Choose Where Your Ad Appears.
After selecting your ad type, Facebook Ads Manager will ask where you want your ad to show:
- Desktop News Feed
- Mobile News Feed
- Desktop Right Column
Important: If your ad isn’t linked to a Facebook Page, you can only run Desktop Right Column ads.
Now, your ad is ready to be designed and displayed to the right audience!
14. Create Your Facebook Ad
The last step is to design your ad with an image or video and a catchy description. You can upload media from your computer, phone, or Facebook library.
Your Facebook ad will include:
- Primary Text – Add up to 5 different text options for various ad placements. Use this space to highlight discounts, offers, or key details.
- Headline – This appears below your image or video and should grab attention instantly.
- Description – This gives more details about your ad. The way it looks may change depending on where the ad appears.
- Call-to-Action (CTA) – Choose what action you want people to take, like “Shop Now,” “Sign Up,” or “Learn More.”
Once everything looks good, your Facebook ad is ready to go live!
15. Track Your Facebook Ads Performance
Once your Facebook ads are live, you need to track their performance. You can do this in two places:
(a) Facebook Ads Manager
(b) Your marketing software
There are over 350 metrics in Facebook Ads Manager, which can feel overwhelming. To keep it simple, focus on these key metrics:
- Performance – Track results, reach, frequency, and impressions.
- Engagement – Check page likes, post engagement, and interactions.
- Videos – See video views and how much of your video people watch.
- Website – Monitor purchases, checkouts, add-to-cart actions, and payment details.
- Apps – Track app installs, engagement, and cost per action.
- Events – Check event responses and cost per response.
- Clicks – Look at CTR (click-through rate), CPC (cost per click), and unique clicks.
- Settings – Review your ad start and end dates, bid, and objective.
By regularly checking these metrics, you can adjust your strategy and get the best results from your Facebook ads!
16. Track and Report on Facebook Ads Performance
You can track how well your Facebook ads are doing by setting up custom reports in Facebook Ads Manager. You can even receive these reports by email.
Here’s how to set it up:
- Go to “Analyze and Report” in the top menu.
- Click on “Ads Reporting.”
- Select “Create Custom Report.”
- Open a saved report or create a new one.
- Click “Save As”, name your report, and check “Schedule Email.”
- Follow the steps to customize and confirm your settings.
Why is reporting important?
Tracking clicks and conversions helps you understand if your Facebook ads are working.
Using UTM codes in your ad URLs lets you track customer actions beyond Facebook.
Your marketing software can show how many leads and sales came from your ads.
This data helps you measure ROI and improve your Facebook marketing strategy.
Keep an eye on your reports to optimize your ads and get the best results!
How to Create Facebook Ads That Actually Work
Facebook Ads can be a game-changer for businesses, but only if done right. If you’ve ever felt lost while setting up an ad, don’t worry—you’re not alone! Here’s a detailed, step-by-step guide to creating effective Facebook Ads, with real-life examples to help you understand each point better.
1. Define Your Target Audience and Create Ads for Them
Before creating an ad, ask yourself: Who is my ideal customer? What do they like? How does my product solve their problem? Facebook allows you to target users based on demographics, interests, and behaviors.
Defining your audience helps ensure your ads reach the right people, saving you money and increasing conversions. To define your audience, consider:
- Age, gender, and location
- Interests, hobbies, and behaviors
- Past purchase behavior
- Device usage
Example:
If you’re selling high-end running shoes, you wouldn’t target people who have no interest in fitness. Instead, you would set your ad to reach people who follow marathon pages, fitness groups, and sports brands. This ensures your ad reaches those who are most likely to be interested in your product.
2. Write a Catchy but Clear Headline
Your headline is the first thing people notice. It should be attention-grabbing but also clearly communicate your message. A strong headline makes people stop scrolling and pay attention to your ad.
Tips for Writing a Great Headline:
- Keep it short and direct (under 10 words is ideal).
- Use action words that create a sense of urgency.
- Highlight the key benefit of your product.
Example:
Instead of saying “Our Shoes are the Best”, try something like “Run Faster and Longer with Our Ultra-Lightweight Running Shoes!” It not only grabs the audience’s attention but also highlights the key benefit.
3. Don’t Use Text-Heavy Graphics
Facebook limits the amount of text you can use in images. Ads with too much text may not perform well, as Facebook prefers visually appealing content. Less text in your image means more engagement.
Tips for Ad Images:
- Use high-quality, eye-catching visuals.
- Keep text on the image minimal.
- Let the image speak for itself.
Example:
Imagine an ad with a long paragraph over the image—people will likely scroll past it. Instead, use a high-quality image of someone happily wearing your product, with a simple tagline like “Unmatched Comfort for Every Step!”
4. Use Simple and Easy-to-Understand Language
Avoid jargon or complex words. Your message should be clear and concise so that anyone can understand it instantly. If your audience has to think too hard to understand your ad, they’ll move on.
Tips:
- Use everyday language that a 10-year-old can understand.
- Focus on the benefits, not just features.
- Keep your sentences short and to the point.
Example:
If you sell skincare products, don’t say “Our revolutionary peptide-infused formula with antioxidants…” Instead, say “Get glowing skin in just 7 days—no harsh chemicals!” The second option is more understandable and convincing.
5. Use Social Proof in Your Ads
People trust what others say about a product more than what a company says. Show reviews, testimonials, or user-generated content in your ad. Social proof builds credibility and encourages potential customers to take action.
Ways to Include Social Proof:
- Customer testimonials
- Star ratings
- Influencer endorsements
- Before-and-after images
Example:
Instead of just claiming “Our product works!”, include a real customer review: “I’ve struggled with acne for years, and this cream cleared my skin in just a month! – Sarah K.” along with a before-and-after photo.
6. Match Your Facebook Ad to Your Landing Page
If your ad promises something, make sure your landing page delivers on that promise. A mismatch can lead to people leaving your website quickly, resulting in wasted ad spend.
Tips:
- Ensure your ad’s message matches the landing page content.
- Keep the design and branding consistent.
- Make it easy for users to take the next step.
Example:
If your ad promotes “50% Off All Shoes – Today Only!”, make sure the landing page clearly shows the discount instead of making users search for it.
7. Have a Direct Call-to-Action (CTA) in Your Ad
Tell people exactly what you want them to do next—buy, sign up, learn more, etc. A strong CTA increases conversions and guides users toward taking action.
Examples of Strong CTAs:
- “Shop Now”
- “Get Your Free Trial”
- “Sign Up Today”
- “Learn More”
Example:
Instead of just showing a product image, include a button that says “Shop Now” or “Get Yours Today” to encourage immediate action.
8. Run A/B Tests
Not sure which image, text, or CTA will work best? Try different ad versions to find out which works best.A/B testing helps optimize your ad campaigns for the best results.
What to Test:
- Different headlines
- Various images or videos
- CTA placement and wording
- Ad copy variations
Example:
If you’re running a campaign for a new coffee brand, create two ads—one with a picture of a steaming cup and one with a happy person drinking coffee. Run them both and see which gets more clicks and engagement.
Bonus Tips for Facebook Ads Success
1. Use Video Ads
Videos grab attention faster than images and can explain your product better. Keep videos short (under 30 seconds) and include captions for those who watch without sound.
2. Retarget Users Who Show Interest
People who visit your website but don’t buy can be retargeted with Facebook Ads. Remind them about your product with a special offer.
3. Monitor and Adjust Your Ads Regularly
Check your ad performance and make adjustments based on metrics like click-through rate (CTR), conversion rate, and cost per acquisition (CPA).
4. Use Facebook Pixel
Facebook Pixel helps track conversions and optimize your ads for better performance. It collects valuable data that can improve future ad campaigns.
Final Thoughts
Creating Facebook Ads isn’t rocket science—it’s about understanding your audience, keeping your message clear, and continuously testing to see what works best.
By following these strategies, you can create high-converting Facebook Ads that drive real results.
Whether you’re a beginner or an experienced marketer, these tips will help you make the most out of your advertising budget.
If you’re experiencing any challenges while creating a Facebook ad, Grow Digitaly is here to help. We offer expert ad creation, audience targeting, and campaign optimization to ensure your success.
Happy advertising!