Want to master Google Ads like the pros? You’re in the right place! Grow Digitaly helps you scale with the best PPC ad services tailored for maximum ROI.
How to Run Google Ads:
World-class DJ Calvin Harris spins tracks that get crowds moving—and you should be doing the same. Not on the turntables, but with Google Ads! Whether your marketing rhythm is offbeat or you’ve never dropped a campaign before, I’m here to help you mix the perfect set that gets your audience dancing to your brand’s tune.
So, grab your headphones and follow my lead as I break down the ultimate remix for running Google Ads like a headline act. Your potential customers are ready to party—and by the end of this guide, they’ll be raving about your business.
Step #1: Click “Create Account Only”
Now, put on your headphones and get ready to drop the beat!
If you’re starting with a brand-new Google Ads account, head over to ads.google.com and click “Start now.” Google will immediately try to walk you through setting up a Smart campaign—a simplified option designed for beginners or those looking for a quick setup.
While it might seem tempting to take the easy route, building your own custom campaigns gives you far more control and better long-term results.
So, don’t select a “main advertising goal” when prompted. Instead, look for and click “Create account without a campaign.” Once you’ve completed that step and you’re inside your new account, click the plus (+) button in the top left corner to create your first campaign from scratch.
Step #2: Choose Your Campaign Type
Think of your Google Ads account as a toolkit—not every tool is right for every job. Just like you wouldn’t use a hammer to fix a computer, different ad campaigns serve different purposes. Whether you’re looking to boost website visits, promote an app, or build brand awareness, Google Ads has specific campaign types tailored to each goal.
So, what are the different campaign types in Google Ads?
- Search (the one we’ll be using in this guide)
- Display
- Video
- Shopping
- Demand Gen
- Performance Max

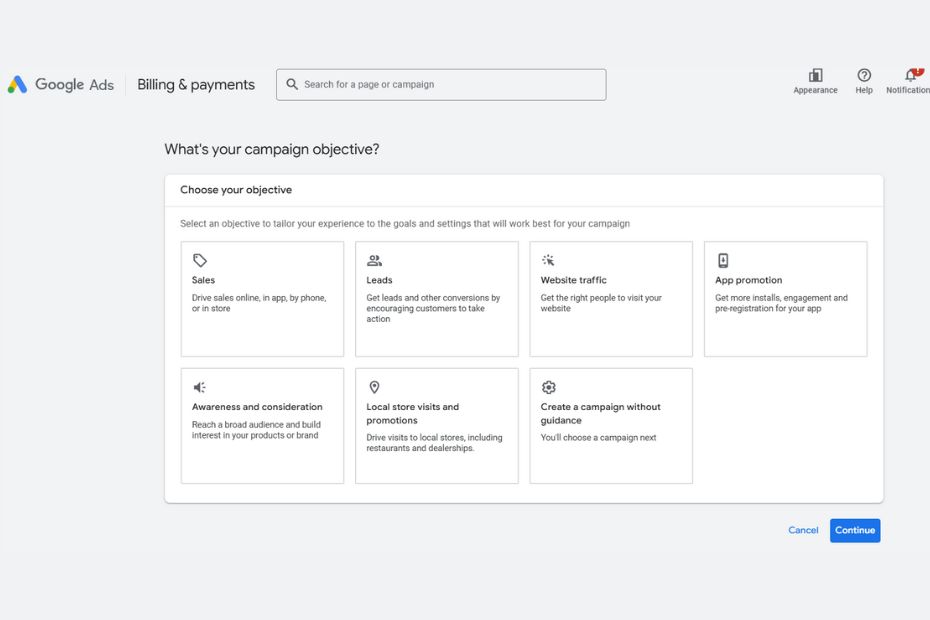
When you start creating a campaign, Google will first ask you to choose an objective—like driving website traffic or generating leads. Based on what you select, it will suggest the most relevant campaign types.
For this guide, we’ll focus on creating a Search campaign, so go ahead and select Website Traffic as your objective.
Pro Tip: As your account grows, don’t stick to just one campaign type. Running a mix of campaigns that align with your PPC goals will give you broader reach and better results.
Step #3: Set up the campaign
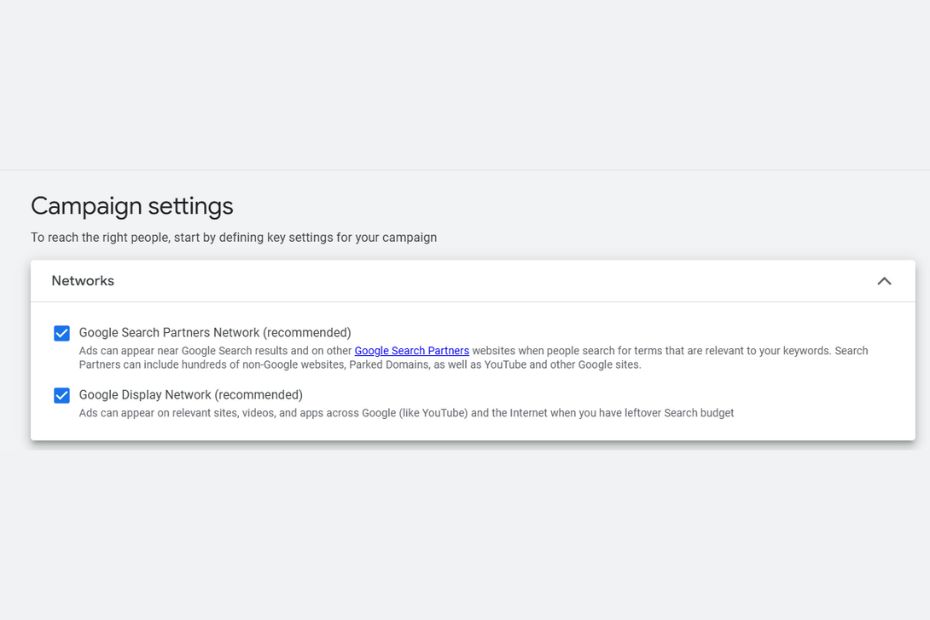
Now it’s time to set the foundation for your campaign by choosing your general settings. Here’s what you’ll be looking at:
- Campaign Name: This is just for your own organization—it won’t affect performance. Name it something clear and specific so you can easily identify it later (e.g., “September Search – Shoes Promo”).
- Networks: Google gives you the option to show your ads on its partner networks—websites and platforms that are part of Google’s extended reach. While this can help expand your visibility at a lower cost, it may reduce your control over where your ads appear and can make it harder to achieve a high impression share on Google Search itself.
Step #4: Define Your Ad Schedule
You’ll want to tell Google exactly when to show your ads so you’re only spending budget during the times that matter most. For instance, you might choose to skip early morning hours when your target audience is less likely to convert.
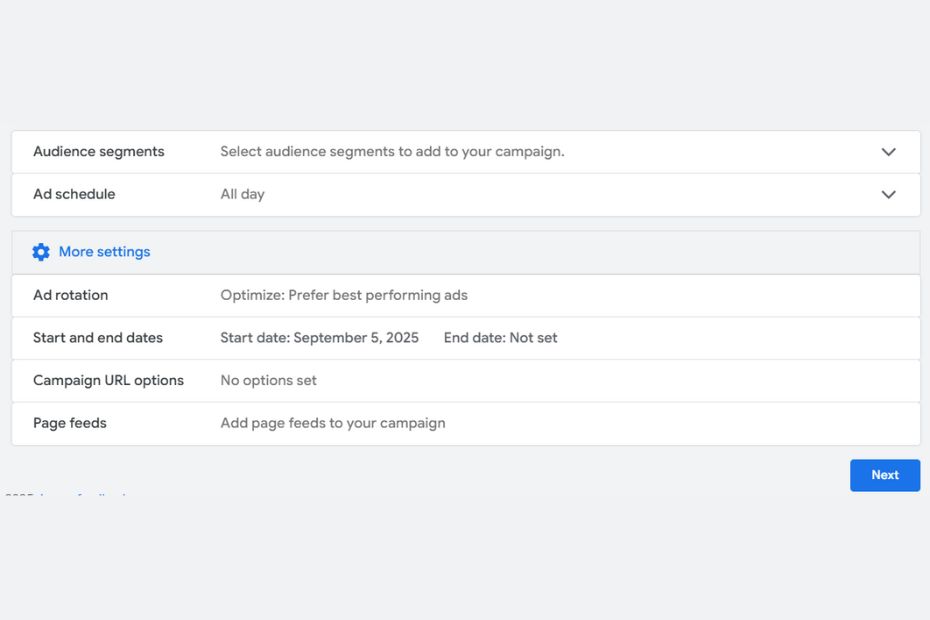
Click “Show more settings” during campaign setup to adjust your schedule. From there, you can select your start and end dates, as well as customize your ad schedule based on the days and times that align with your goals.
Pro Tip: ⚠️ Remember, your ad schedule is based on your Google Ads account’s time zone, not the time zone of your target audience. So if you’re advertising to people in different time zones, you’ll need to adjust accordingly. Don’t worry—we’ve got you covered with a guide on setting up ad scheduling the right way.
Step #5: Set Your Target Location and Language
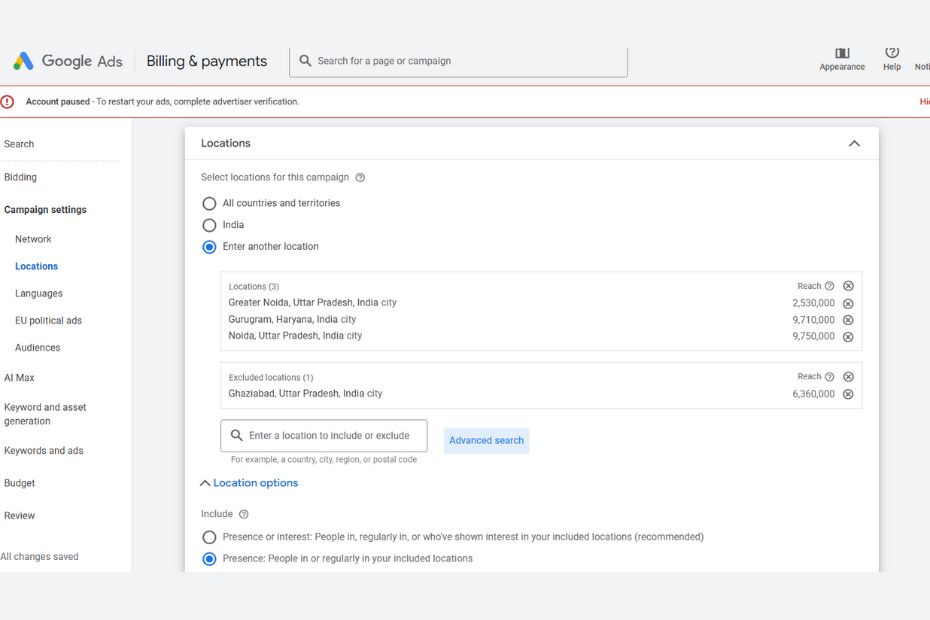
It’s important to target your ads to the right audience—not everyone needs to see them. This step lets you define the specific locations and languages you want your campaign to focus on, ensuring your ads reach the people who matter most to your business.
Pro Tip: Select “presence” to make sure your ads only show to people physically located in your chosen area—not just those interested in it.
You’ll also notice an audience segments section, but you can skip this for now. This is where you’d add remarketing lists, which are less commonly used for search campaigns.
Step #6: Set Your Daily Budget
Finding the right Google Ads budget can be challenging. Spend too little, and your campaign may not gain enough traction; spend too much, and you risk exhausting your budget too quickly.
To set an effective daily budget, start by estimating your total monthly spend. Use keyword research and industry benchmarks to get an idea of your average cost-per-click (CPC) or cost-per-acquisition (CPA).
Once you have your monthly estimate, divide it by 30.4 (the average number of days in a month) to determine a practical daily budget.
Pro Tips on Setting Your Budget
Do: Understand how daily budgets operate. For example, if you set a daily budget of ₹600, Google might spend ₹900 on one day to maximize clicks and conversions, then only ₹300 on another day to balance your overall monthly spend.
Don’t: Assume your budget should stay fixed indefinitely. In PPC, flexibility is key. Avoid pouring money into a campaign that isn’t delivering just because you hope it will improve.
Don’t: Set your budget too low. While being cost-conscious is important, a budget that’s too small will limit your reach and results. Remember, investing wisely is essential to generating returns.
Do: Regularly check the Google Ads budget report to monitor your daily and monthly projected spend across your account. This helps you stay on track and adjust as needed.
Step #7: Select Your Bidding Strategy
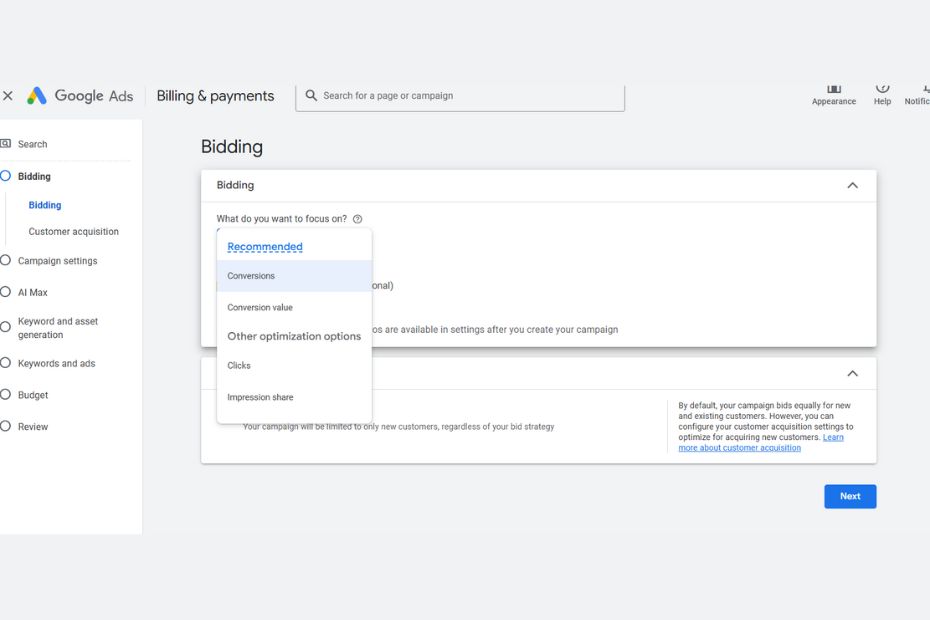
There are various ways Google can manage your budget depending on your campaign goals. To choose your bid strategy, select “Or, select a bid strategy directly (not recommended).” From there, you can pick the option that best aligns with your objectives.
There are two main categories of bidding strategies:
Manual bidding: With manual bidding, you set the maximum cost-per-click (CPC) bid for each keyword. This is the highest amount you’re willing to pay for a click, though you may actually pay less—never more. This approach gives you full control over your bids, but setting them too low could limit your campaign’s performance.
Automated bidding: Automated bidding lets Google adjust your bids automatically based on your campaign goals and performance data. This can help optimize results, especially if you’re still learning how to manage bids effectively. It’s important to monitor your campaign regularly to understand how much clicks are costing.
In this section, you’ll also find additional settings like ad rotation.
From my experience, these settings are often left at their defaults, as the best choice depends on each business’s specific needs. By default, Google favors showing your top-performing ads to maximize your return on investment.
However, if you want to evenly test different ads or have varied copy you want to showcase equally, you can choose the even rotation option.
You’ll also come across an ad extensions section, but we’ll leave that for later.
Step #8: Choose Your Keywords
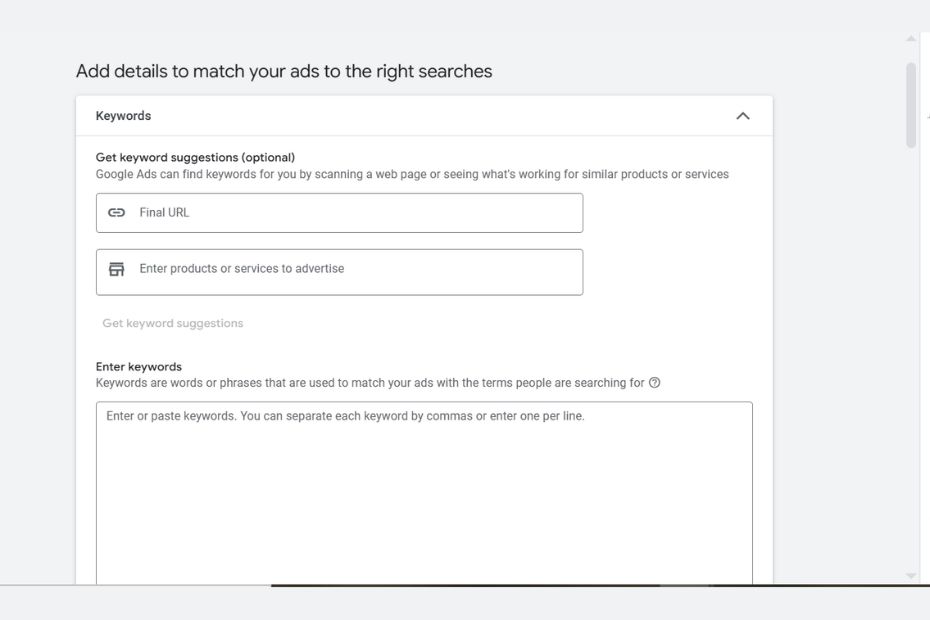
The next step in running Google Ads is a big one—choosing the right keywords. They’re the backbone of your entire campaign.
Keywords are the words and phrases your audience types into Google when they’re searching for something. With Search ads, you bid on these keywords to determine when and where your ads appear. Before we dive into selecting keywords, here’s a preview of what your screen will look like:
- Ad Group Name: Ad groups act as containers for your ads and keywords, helping keep your campaigns organized. For the best Google Ads account structure, organize your ad groups around specific themes and name them accordingly.
- Default Bid: If you’re using manual bidding, you’ll need to set your maximum cost-per-click (CPC) bid as you add keywords to each ad group. Our keyword research guide and the tips below will help you estimate projected CPCs for your chosen terms.
PPC Keyword Pro Tips:
Use keyword research tools—like Google Ads’ Keyword Planner or our Free Keyword Tool—to identify core keywords based on their monthly search volume and average CPC. This helps you plan your campaigns more effectively.
Do: Focus on keywords with clear commercial intent—terms like “cost,” “for sale,” or, if you’re running local PPC, location-specific phrases like “divorce lawyer Boston.”
Don’t: Rely solely on keywords. While keywords are essential, they’re only one part of a successful PPC strategy and won’t drive results on their own.
Don’t: Overlook your bidding strategy when setting up keywords. Even if you don’t manually set a Max CPC for each keyword, your overall bidding approach will influence how you target and prioritize keywords.
Don’t: Overload your keyword list with low-volume variations of your main keywords. Using the right match types can help you streamline your list and avoid unnecessary clutter.
Match Types
When adding keywords, you’ll need to choose a match type. This is important because people search using many variations (called queries) that may not exactly match your keywords but are still relevant. Match types tell Google which variations you want your ads to appear for.
Using a mix of match types gives you greater flexibility. The three main keyword match types are outlined below, ordered from the broadest to the most restrictive in terms of search query targeting:
Broad Match: Your ad can show for any search query related to your keyword.
Example: Your ad might show for searches like:
- affordable SEO services Noida
- top digital marketing services
- SEO company near me
(Broad match lets your ad show up for a wide variety of related searches, even if the exact keyword isn’t used.)
Phrase Match: Your ad shows for queries that include the same meaning as your keyword, even if additional words are included.
Your ad could appear for queries such as:
- best SEO services in Noida for small business
- affordable best SEO services in Noida
- best SEO services in Noida 2025
(The exact phrase “best SEO services in Noida” appears in the search, but there may be additional words before or after.)
Exact Match: Your ad only shows when the query closely matches the exact meaning of your keyword.
Your ad will only show for searches that closely match the exact phrase, such as:
- best SEO services in Noida
- [best SEO services in Noida]
- best SEO service in Noida
(Exact match restricts your ad to show only when someone searches for your exact keyword or a very close variation of it.)
Pro Tip: There’s no universally “right” or “wrong” match type—it all comes down to your specific goals. The best approach is to experiment with all three to see which delivers the strongest results for your keyword strategy. If you’re unsure where to start, phrase match is a reliable choice. It strikes a solid balance between broad reach and keyword relevance.
Use negative keywords
Negative keywords are words or phrases you add to stop your ads from showing up in searches that aren’t relevant to your business. For instance, if you’re advertising CDL training classes, the keyword “CDL” might also attract users searching for jobs in the trucking industry. To avoid this mismatch, you could exclude terms like “jobs,” “positions,” and “openings”—ensuring your ads reach people interested in education, not employment.
It’s smart to start with a basic list of negative keywords, then refine it over time. Once your campaign is live, use the Search Terms Report to review the queries your ads are showing for, and continue building out your negative keyword list to improve targeting and efficiency.
Step 9: Set Up Your Ad
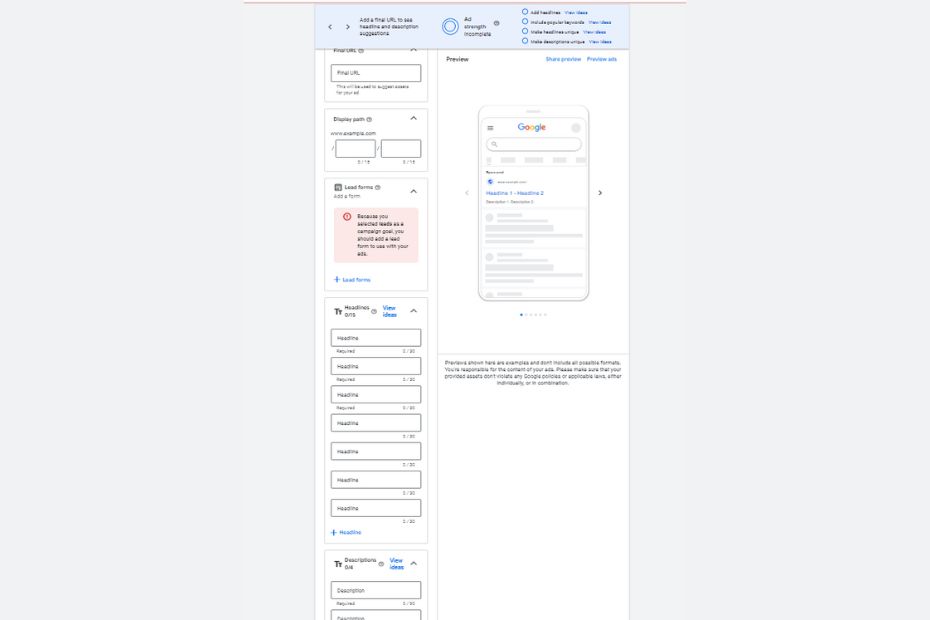
Alright, everything is set up and ready to go. Now it’s time to present it to the world. Just like in a high-stakes competition, how you present your final product matters just as much as the quality behind it. Even the best offer can fall flat if the ad itself doesn’t grab attention or inspire action.
Your ad creation window will look something like this:
Google Ad Copy: Pro Tips for High-Performing Ads
- Follow responsive search ad best practices.
Since Google automates how your ad assets are displayed, each headline and description needs to stand strong on its own. Make every word count—ensure each line is impactful and aligned with your message.
- Always include a clear CTA.
A compelling call to action is essential. Tell users exactly what to do next with phrases like “Sign up today,” “Call now,” or “Get started.” The clearer the path, the higher the chance of conversion.
- Don’t be dull.
Bland ads get scrolled past. Use emotional, engaging language that resonates with your audience and makes your ad stand out on the SERP. Check out our ad copy examples if you need a creative boost.
- Don’t go overboard.
Your ad is a reflection of your brand. While CTAs are important, avoid cramming in too many or sounding overly aggressive. Keep your messaging clean, professional, and aligned with your brand’s voice.
Step 10: Add Your Ad Assets
When it comes to creating a strong ad, your core message is the main focus—but the details you add around it can make a big difference. Ad assets (formerly called ad extensions) serve as those valuable extras. They provide additional information that can enhance your ad, improve click-through rates, and help your message stand out on the search results page.
Sitelink extensions offer viewers additional ways to engage with your ad by providing multiple clickable options.
While it’s possible that some sitelinks may not always appear or generate clicks, they won’t negatively impact your ad’s performance. The goal of ad assets is to enhance your ad’s visibility and appeal, so there’s little downside to giving them a try.
To add assets to your ads, just go to the Assets section in the menu on the left side of your Google Ads dashboard. From there, Google will guide you step-by-step through the setup process.
The best part? Google continuously updates and expands its ad asset options.
Step 11: Set Up Device Targeting and Advanced Options
Let’s dial things in. When it comes to PPC, the extra settings—like device targeting—can make a big impact. Don’t be afraid to explore and take full advantage of them.
If you’re using manual bidding on Search campaigns, you can adjust your bids based on the device type. For example, you might choose to pay more for clicks from mobile users or scale back on desktop traffic. You also have the option to completely exclude a device by decreasing its bid by 100%.
Experiment and explore. Feel free to try out different strategy combinations to see what connects best with your audience. Keep an open mind—ruling something out too early, like excluding a device without performance data, could limit your results unnecessarily.
Pro Tip: In Display campaigns, device targeting can be managed directly through a checkbox in your campaign settings. No matter the campaign or bidding type, you can monitor performance by device in the Devices section of Google Ads. This makes it easy to fine-tune your approach for mobile, desktop, or tablet based on real data.
Step 12: Optimize Your Landing Page
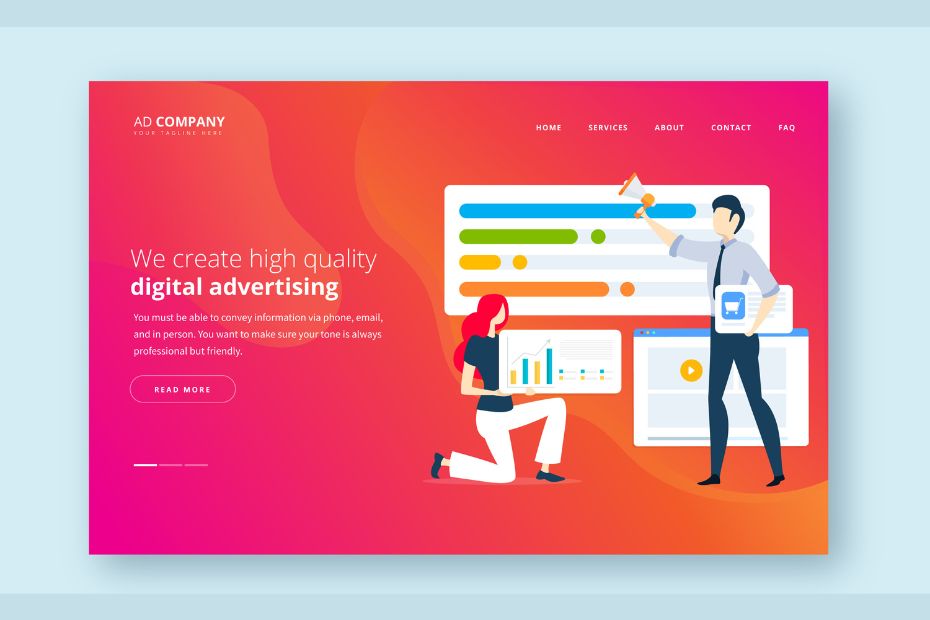
Image Credit: Freepik
What’s a powerful Google ad worth if it leads to a weak landing page? Not much.
It may sound blunt, but one of the hardest truths in PPC is this: even the best ads can’t save a poor landing experience. You might have the perfect targeting, compelling copy, and a strong offer—but if the page users land on isn’t optimized, your results will suffer.
Getting the right person to click is only half the battle. It’s your website or landing page that closes the deal. So, my final tip for building a successful Google Ads account structure: make sure the destination is just as strong as the ad that brings people there.
To maximize the effectiveness of your ads, make sure your landing page is working just as hard as they are. Here are some best practices to keep in mind:
- Get the technical foundation right:
Ensure your page loads quickly, is mobile-responsive, and uses HTTPS for security. If your page loads slowly, users won’t stick around for long.
- Prioritize the call to action (CTA):
Whether it’s a button, form, or sign-up prompt, your CTA should be clear, visible, and easy to act on. While it’s tempting to showcase everything your brand offers, remember—visitors arrive with a purpose. Help them complete that goal without friction.
- Keep the design clean and user-friendly:
A visually appealing, uncluttered layout builds trust and keeps users engaged. Need ideas? Check out these landing pages we’ve picked to help spark ideas.
Step 13: Go Live with Your Ad
You’re live! Before you wrap up, double-check that your billing information is set up correctly. Then, save your campaign and launch it.
What’s next? From here on out, it’s all about tracking performance and optimizing over time. Here are a few final tips to help you stay on track:
Get familiar with PPC reporting and campaign audits—these will help you evaluate what’s working and identify areas for improvement.
Monitor key PPC metrics like CTR, conversion rate, cost per conversion, and impression share to guide your next steps.
Keep an eye out for any ad disapprovals that might prevent your campaign from running properly.
Once your campaign is live, give it time to gather data before making changes. I recommend waiting at least two weeks to 30 days—even longer for brand-new campaigns. PPC success takes patience, so resist the urge to tweak too quickly.
You’ve done the work—now let your campaign run and start gathering insights. You’re officially up and running with Google Ads!
Conclusion
Congrats—you’ve just gone from beginner to campaign-ready. Setting up a successful Google Ads campaign takes more than just clicking a few buttons. It’s about strategy, structure, and knowing how to make every click count.
From choosing the right campaign type to writing ads that convert and building landing pages that seal the deal—you now have the full roadmap.
Google Ads isn’t a one-time setup; it’s an ongoing process of testing, optimizing, and growing. But you’ve got the tools, the knowledge, and now the confidence to launch campaigns that actually perform.
So go ahead—hit that “Publish” button. Your next customer might be one search away.